1 1/4 cup all-purpose flour
1/4 tsp salt
1/4 cup solid vegetable shortening
3 tbsp cold butter
2-4 tbsp ice-cold water
Combine flour and salt in large bowl; mix well. Cut shortening and butter into flour mixture using a pastry blender. This part right here is the secret of the entire recipe and why crusts can come our inconsistently. It is extremely, extremely, extremely, extremely important that you stand there and cut the shortening and butter into the flour mixture until you have one consistent mixture. You should not be able to tell the difference between the butter, shortening or flour mixture. It should have it's own for-sure consistency...crumbly is my best description. This is what mine looks like.

Notice there's no white or yellow? It's all the same color and crumbly consistency.
Now, you sprinkle 1 tbsp of water over the flour mixture, gently toss with a fork. Repeat until mixture is moist enough to form a ball. Tip: the water is supposed to be ice-cold so before I start mixing the dough above, I pour a glass of ice water on the counter and then when I'm ready it's sitting there for me, nice and chilly. I usually only have to add 2 tbsp of water to get the dough to form a ball, but there have been times I've used more. Only add just enough water to form the ball, not too much.
Gather the pastry into a ball; flatten slightly. Cover and refrigerate dough for 30 minutes. Do not skimp on this time frame, 20 minutes does not equal 30 minutes. You can definitely refrigerate longer, just don't shorten this time frame.

Now your ready to roll out your dough! Flour a pastry mat, then place dough on top. Cover dough with a little more flour and roll it out to desired pie plate size. Be sure and use enough flour so the dough does not stick to your rolling pin. Also, the less you physically touch the dough, the better.

Like my marble rolling pin? My mom bought it for me at an estate sale, love it!
Alright, once you are ready to place your crust into your plate, fold the dough in half and place plate close by. [Sidenote: I also always spray my pie plate so the crust won't stick later.] This makes the crust easier to lift and transport. Carefully lift crust and place in plate. You will probably have to do a little reconstruction work. Don't worry or get frustrated, that's OK! Work your way around the edge and make sure your crust is even all the way around. You might have to remove taller sections and place them in shorter sections. The more crusts you make, the more even you'll learn to roll it out and the less of this you'll have to do.
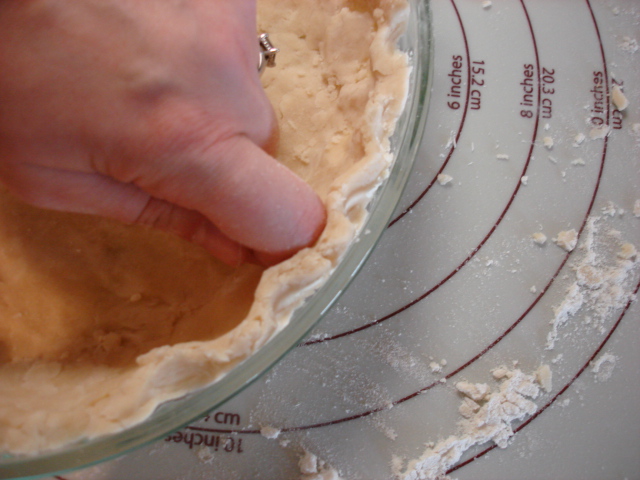
The crinkle part of crust-making was always part of what intimidated me. I've seen David's mom and my own grandmother do this differently...but, this is the way David taught me. Shocked that my husband taught me how? What can I say, his mom brought him up right. Place the biggest knuckle on your forefinger on the crust and then use your thumb and forefinger on the other hand to place the crinkle around your knuckle. Continue doing this all the way around the plate, it only takes about a minute and makes such a difference in the presentation!
And VOILA! Here's what the whole thing will look like prior to cooking.

Place a yummy filling in prior or post baking (depends on the pie your making). Tip: if you're making a cream pie where you bake the pie crust separately...poke the dickens out of the pie crust with a fork (throughout the entire bottom and sides) prior to baking. I made this crust into a tasty pumpkin pie with the recipe I shared last month. Try both of these recipes for Christmas. You won't regret it!

No comments:
Post a Comment