Tuesday, July 17, 2012

White Chicken Enchilalas...

No, that's not a typo.  One of my best friends likes to call enchiladas "enchilalas," so I thought I would just go with it in this post.  As you all probably already know, I love the Pioneer Woman AKA Ree Drummond.  She's, like, my favorite blogger/cook/photographer ever.  Right?  I even got to meet her the last time she was in Tulsa.


It was an amazing moment in my life.  Kinda, haha!  Anyhooo...I decided to try the recipe for white chicken enchiladas in her new book (which, yes, is autographed by the way).  She doesn't have this exact recipe on her website, but she does have a very similar one (click here for the printable) and since I didn't follow her recipe exactly anyway, I don't suppose it really matters all that much.

Starting out, though, I boiled some chicken tenderloins while I was chopping up some peppers.  The PW wants you to roast the peppers...I wasn't into all that, so I skipped that part.  Hey, by the way, those jalapenos are from our garden...just thought I'd toot that little horn.


Next up, you throw half of those peppers, along with a diced onion, into a hot skillet with some oil and cook until the onion is translucent.  Now, if you roast the peppers, unlike me, you'd just cook the onion at this point.


I grilled the other half of the peppers in a separate pan (that you'll need here in a little bit anyway).


After the onions are translucent, you'll throw the shredded chicken (that you were boiling earlier) and 1 cup of chicken broth in the mix.


And then, what you're supposed to do is pour in 1 cup of heavy cream.  Now, I always try to lighten up the PW's recipes, but I also am the queen of using what I have on hand...and that was half and half.  So, I poured THAT into the pan.  If I'd only had milk, that would have gone in instead.


After that, you'll want to throw in a pinch of salt and 1/2 teaspoon of paprika.  And if you've roasted the peppers, like you were supposed to, then you'll throw them in at this time.

Take the other skillet (you know, the one I grilled my other peppers on and that you've since removed?) and melt some butter.  If you're a purist, that'd be four tablespoons.  Then sprinkle in 1/4 cup of flour and whisk it around a bit until it's nice and combined.


Then pour in another two cups of chicken broth and mix until it's smooth.  While that's cooking, shred some Monterey Jack cheese, around 1 1/2 cups worth of it.


And add it into the mixture with another 1/2 teaspoon of paprika.


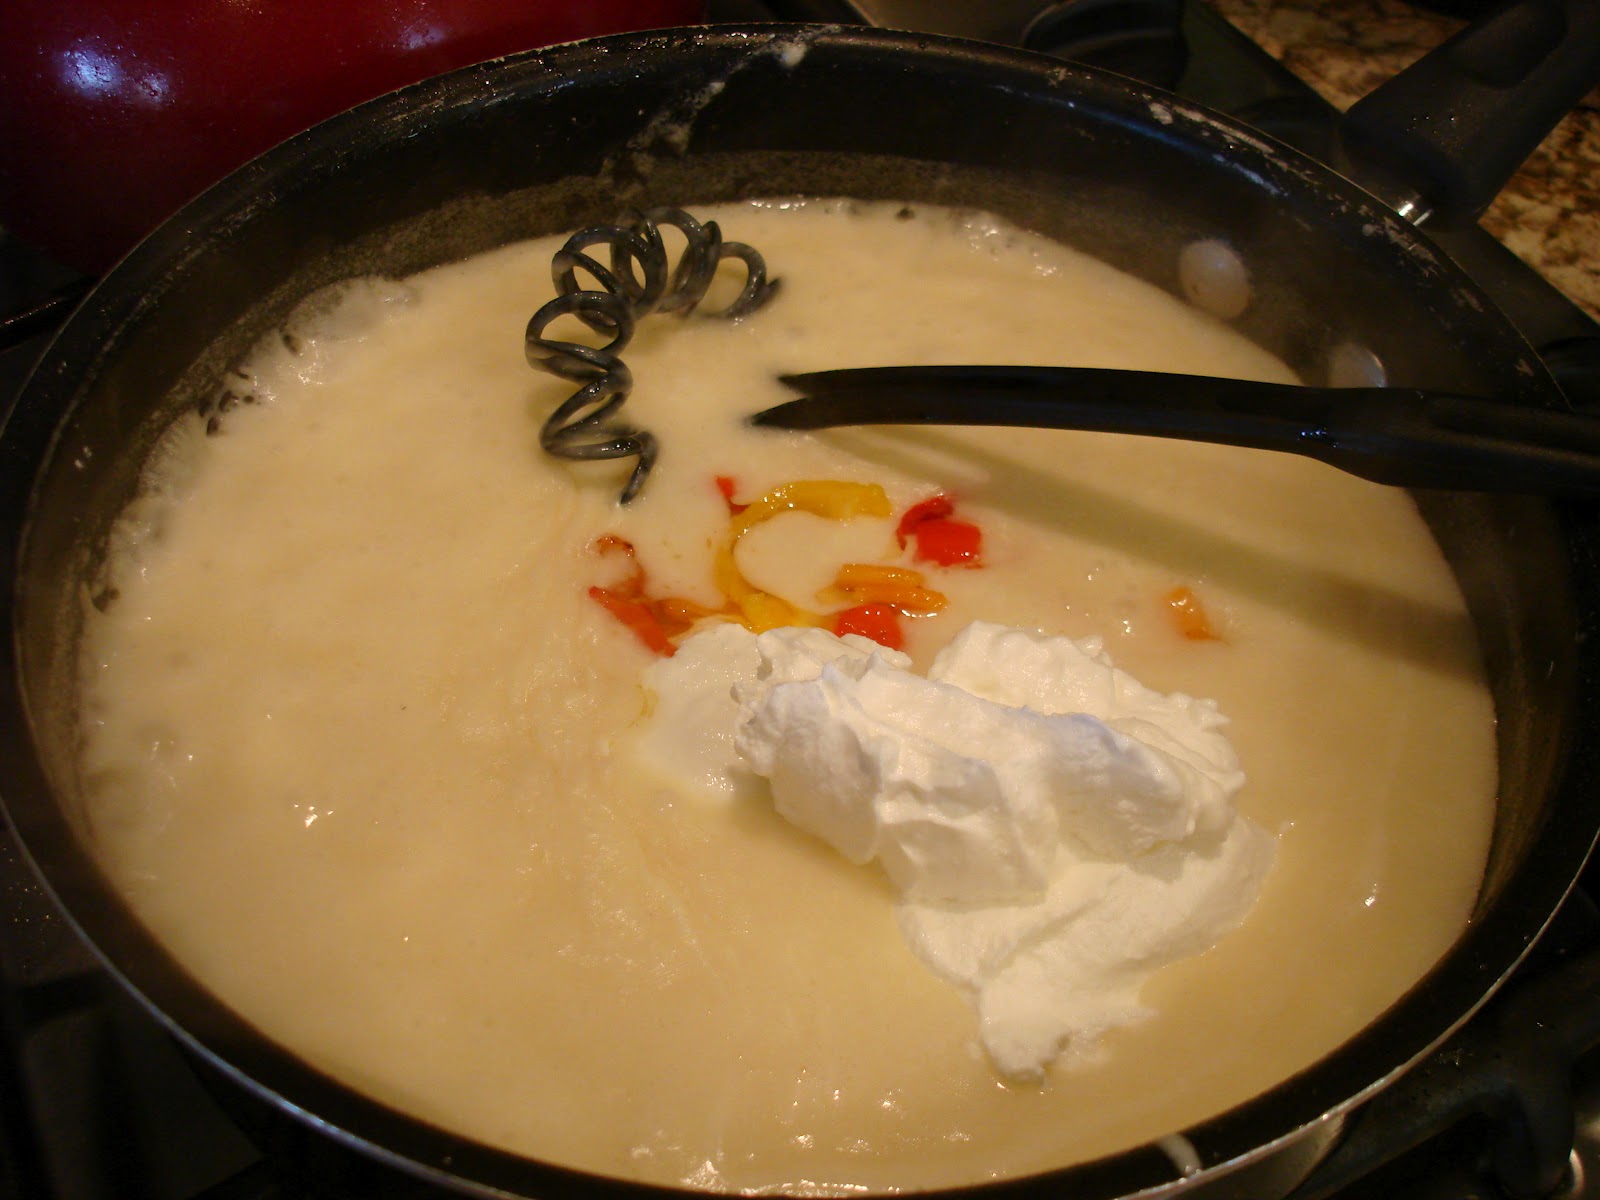
After that's all mixed, throw in the peppers you grilled (or roasted) earlier with 8 oz. of sour cream.  At this point, I was a little shocked at the cream, cheese and sour cream content...but, sometimes you just have to go for it, right?  Stir all of that up!


At this point, you actually start making the enchiladas.  Fill the tortillas with the chicken mixture, then place seam side down in a pan.


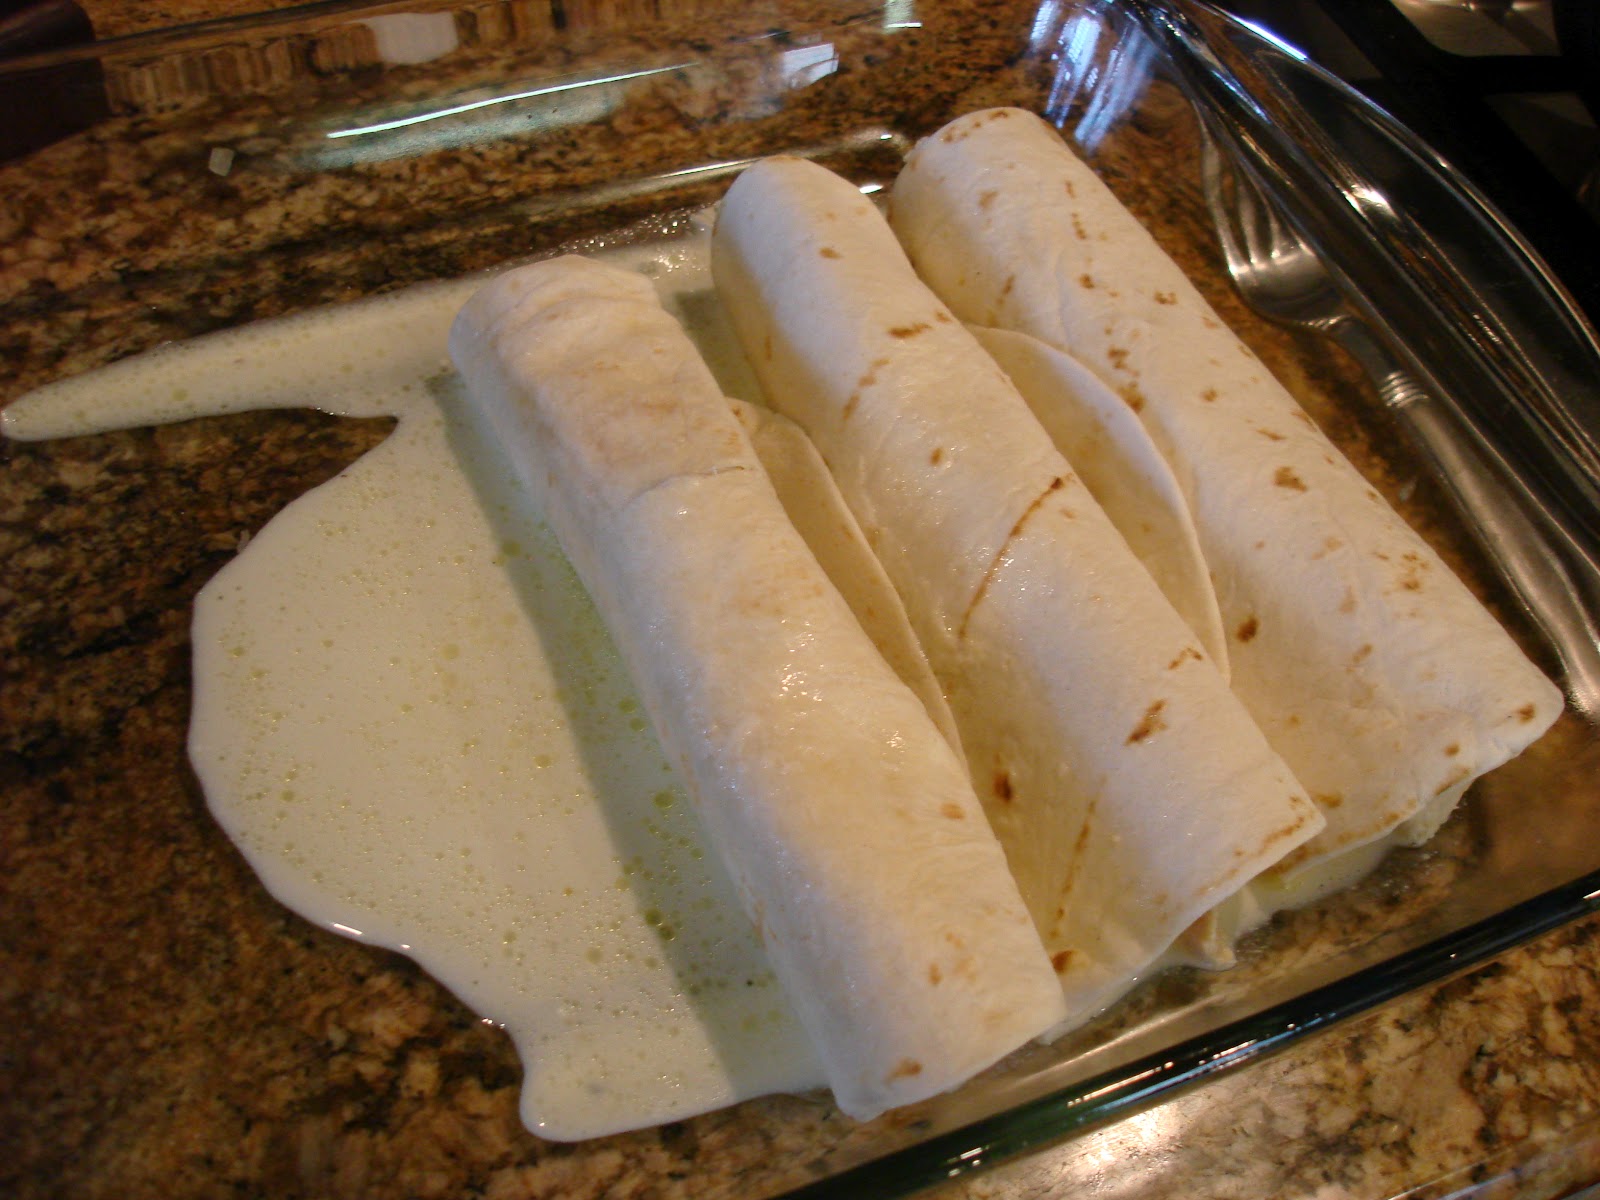
And here's my entire pan full of delicious enchiladas.


I still had a ton of leftover sauce in the chicken mixture pan, so I just poured it over the top.


Then, you want to pour the creamy mixture over the already exorbitantly caloric enchiladas...this'll just make that caloric content number skyrocket.


Yea...that's right.  At this point the PW wants you to put another cup of cheese on top.  I did not do that...these are decadent enough already!


Throw those bad boys into the oven at 350 degrees for 20-25 minutes or until they're bubbling.

While I was waiting on those enchilalas to turn brown and bubbly, I made something with these beauties from my back yard.  Can you guess?


Salsa!  First I lopped off their tops...


Then, I quartered them and threw them in my food processor.  Then, I grabbed this cute baby onion.  Our OKC church is funding a community garden and I grabbed a couple of these the last time I was in town.  I chopped this little guy in half and threw him in the food processor as well.


Along with some fresh cilantro, garlic and salt.  Oh yea, and a smidge of red cayenne pepper.


Mix that on up...beautiful and delicious!


Around this time, the enchiladas will be ready.  I threw (like the PW requests) some fresh cilantro on top.  I did, also, wait a few minutes for the mixture to thicken a little on standing, so the sauce doesn't just puddle in the pan.


These, along with fresh salsa and tortilla chips, was our supper.  And it was great!  I will say, though, that every time I make enchiladas...I swear it's worth just going to a Mexican restaurant and paying $10-15.  It's more work than I normally like, but it usually turns our pretty darn good!  It'll probably be a while before I make these or another one of my enchilada recipes...I gotta forget how much effort I have to put forth...but, I'm sure I'll be making this again.  It was great!

Again, if you'd like to see the Pioneer Woman's pictures, instructions and printable recipe, just click here!  But, don't feel you have to follow the recipe verbatim.  This isn't one of those recipes where, if you skip one step, it will completely mess you up.  As you can see, I didn't follow it 100% and they turned out fantastic!

Monday, July 16, 2012

The Secret Life of Marilyn Monroe

This weekend I was lucky enough to spend some time with family and friends.  Friday night I had book club, which was as enjoyable as ever.  I really don't know what I'd do without this group of girls as friends, they really are the best.  Then, on Saturday my aunt, Sherry, down in Norman had a family get-together.  My other aunt, Becky, who lives in Oregon, only gets to come down once a year and so this get-together was in her honor.  

Last year I didn't get to see Becky because of our little stint in San Antonio, so I hadn't seen her since our wedding the year before.  Boo to that!  It was so fabulous seeing everyone, including most of my cousins and their sweet little ones. 

I can't wait for the next family get-together...but, I probably won't have as many tomatoes to contribute next go around.  Luckily, my family are HUGE tomato eaters and so I was able to unload every single tomato I had on my counter with them.  Delicious, but hard for just one person to eat them all!  Right now, there's just one lonely tomato ripening on my counter...I think I can handle that, ha!

But, speaking of book club...I realized on Friday when I spoke about this book to my club, that I hadn't done a review on here.

There have been a number of biographies about Marilyn Monroe, even one autobiography from Marilyn herself.  This particular biography I picked up at Half-Price Books, my favorite book retailer, in audiobook form.


When I started The Secret Life of Marilyn Monroe, I have to say that my main experience and knowledge about Marilyn Monroe included a few movies and the fact that my step-dad really likes her.  She was kinda the "it" girl in his generation.  And so what I learned from this book was a lot.

Did you know that Marilyn Monroe...
  • was an orphan?  
  • suffered from mental illness?
  • was a victim of domestic violence?
  • liked to be nude...like, a lot?
  • was coached into playing out her sexy persona?
  • didn't really know who her father was?
Some of these I'm stretching a bit...like the fact that she was an orphan.  She knew her mother, however, (Marilyn Monroe's) Norma Jean's mother gave her up and did not raise her.  Mostly because she, herself, was suffering from mental illness and was institutionalized for long periods of time in her life...not really an environment conducive for raising a small child.  Actually, Norma Jean's "foster mother" and her mother's best friend fought over who got to raise her because Norma Jean was such a wonderful child.

There is a wealth of information, like this, in the book that was completely and totally fascinating to me.  In fact, this book captivated me enough that I'll probably continue to read more about Marilyn Monroe.  She was an intriguing person and it was such a shame that her life ended in her prime.

I highly recommend giving this book a whirl, if you're into that kinda thing!

Thursday, July 12, 2012

Game of Thrones

I was gonna wait.  Seriously, I was.  My perspective when I re-kick-started this blog was to review an entire book series in one shot.  And I've decided, that for this series at least, I cannot do that.  My first excuse?  EACH book is 1,000+ pages.  My second excuse?  OK, so I just finished the third book and it was UH-mazing.

But, to give this series a fair review, lets start at the beginning.  Book 1: Game of Thrones


I'll be honest and say that it took me quite a little while to get "in to" this book.  There are a TON of characters, so many that you have an appendix in the back that's a good 20+ pages.  Plus, there are a couple maps of the land layout in the front as well.

These books are written so that you jump from one character's first perspective to another's.  In one chapter you might be following Bran's story, the next Daenerys, the next Cersei and the next Tyrion's.  All the way down the line of main characters...and there are a lot of those.  Main characters, that is.  In fact, you might not get back to Bran until fifteen chapters later...yet, his story might also be picked back up two chapters down the road.  Confusing, right?  Also, maybe a little hard to get "in to" as well.

Really and truly, I think this first book sets the tone for each of the characters'...well, um, characters.  You get to know them and whether or not you like them.  Who's evil?  Who's not?  What's their back story?  What do they look like?  That sort of thing.  Plenty happens (but mostly towards the end) once you've been fully introduced to all.

Another thing about these books/characters.  It drives me crazy that some of the characters' names are so similar.  Tyrion, that I mentioned earlier, is the son of Tywin.  Plus, there's another house with the last name Tyrell...oh, and another with the last name Tully.  I mean, really?  Enough with the similarities already.  Just a little beef of mine...I still find myself flipping back and forth between the appendix and text if I haven't read about a certain character in a while.  Just to make sure I don't mix myself up.

But, if I'm truly honest, my real beef with this first book is that my absolute favorite character dies in the end.  I mean, seriously?  What a load of...ummm, disappointment?  After discussing this with a couple of fellow book club members, they informed me that in this series: become attached to NO ONE.  Any character can die at any given point in time, whether they be a main character or no.  This is kinda hard for me in that I like to relate to characters.  I find ones that I like and feel like I have something in common with them.  I can't do that in these books.  And I'm still having a little bit of a hard time with it, even now.

With all that being said, the first book shines in the first season of the show on HBO.  Wanting to know who my favorite character might be?  I'll give you a hint, he's the only character on the DVD cover...watch (or read!) and figure out who he is.


Moving along, Book 2: A Clash of Kings


If the first book introduces you to the main characters, then the second really starts to set the stage.  Some major plot thickening has been set up at the end of book one and book two really starts to develop these story lines.  And seriously, this book has about five stories going at one time.  The title really and truly, perfectly sums up what's happening.  There are a bunch of self-proclaimed kings running around battling it out to be the one true king of the land.  And this book includes each kings' adventure along the way.  No wonder it's 1,000+ pages with all that goin' on.

When I completed this book, I felt a lot better (and proud of myself) for not becoming overly attached to any new characters.  I still favor some over others (how can you not?), but when characters died I wasn't overly upset.  This book has an extremely well-developed albeit complex story line and I truly enjoyed it.

Season 2 of the HBO series encompasses this book.  I haven't started season 2...mostly because it's not available on Netflix yet.  We don't really have the need for HBO in this household, I guess.  But, I can't wait to see it when it's available on DVD/Blu-Ray!


This leaves us where I just finished, Book 3: A Storm of Swords


Now that you know all the characters...and the plot has been developed...let's just completely shake things up.  At least, I think that's what George R.R. Martin was thinking when he wrote this book.

This book, now that I'm used to Martin's writing style, has such a complex and engaging story line and I loved almost every minute of it.  I'm almost afraid to say that I know I'm over half-way through with this series.

Some characters that I've come to know and loathe finally died, while certain details of the plot were twisted.  And I mean t-w-i-s-t-e-d.  With a capital T.  The last 50-100 pages kept me guessing and were the best part.  Let me just say that...if you snoozed through books 1 and 2...book 3 is well worth the wait.

With each of the two previous books, I needed a breather before I started the next.  The first one I've already explained.  But, as for the second one, I simply needed it because the story is so complex and has so many characters.  Sometimes when I read I just want to read...and not think.  I need fluff periodically.  Make sense?  So, between each of these three books there has been at least a one month window break.  I will NOT be taking that break this go-around, if that tells you anything.

Lastly, I'll just say that I know season three on HBO went into production at the beginning of this month.  If you haven't read the books and just watched the show...  You lucky ducks, you're in for a treat!

Needless to say, I definitely recommend this series!  Stay tuned in the coming weeks for a final series review and wrap-up!

Wednesday, July 11, 2012

Tomato Overload

Remember how I told you that I had not one, but two tomato plants?  And how I'm the only one that eats tomatoes in my house?  Yea, sometimes I wonder what I was thinking.  And then I eat a warm, homegrown, sliced tomato with a little salt...and then remember why I planted two tomato plants.  Deliciousness, that's why.

So, around this time of year is when you start to become overrun with tomatoes.  And I'm becoming overrun faster than most because I'm the only person eatin' 'em!  So, last week I decided to try two of my preserving recipes from my Put 'Em Up Book.


First up, oven roated tomatoes.  I wasn't quite sure how these were going to turn out, but the recipe was super simple.  And honestly, I thought they might turn out a bit like sun-dried tomatoes.  Not quite, but I'll definitely be thinking of some uses for them in the weeks to come.  So, here's how it goes...start out with five pounds of tomatoes.


Slice them in half and toss with any light-flavored oil, I used extra virgin olive oil.  Then, arrange them cut-side up on a baking sheet (or two).


Roast at 250 degrees for 5-6 hours, until the tomatoes are shriveled and browned in spots.  Here they are part way through the roasting time.


And tada!


Since I didn't want to use these all up immediately, I used my Food Saver to preserve them for the freezer.  The book says you can save these in the freezer within 4-oz. containers for up to 6 months.  I told my MIL what I did and she said that they'll probably last waaaay longer stored in my air-tight bags.


Do you have a Food Saver?  They are the best thing since sliced bread, if you ask me.  I bought one with the gift cards from our wedding almost two years ago and I love, love, love it!  Highly recommend investing in one.  Here's what ours looks like, black to go with our other black and red appliances!


Next up, tomato paste!  I make homemade pizza a lot.  I mean, a lot.  And the number one ingredient in my pizza sauce recipe is tomato paste.  So, what better way to put our tomatoes to good use?  And luckily, this is a super easy recipe too!

I started out with another five pounds of tomatoes.  Lug out two huge pots and fill with water.  Bring one big pot of water to a boil and heavily ice the other.  Drop the tomatoes, one pound at a time, in the boiling water.  Blanch until the skin begins to loosen, approximately 60 seconds.

At this point...Molly said I was being too boring for not playing with her and decided to go lay down in her "chaise lounge."


Scoop the tomatoes out of the boiling water and plunge them into the ice bath.  Continue blanching in batches until you're done.  Funny, the tomatoes don't look very different to me, just kinda wrinkly and split.


At this point you want to core the tomatoes and then peel the skin away with a paring knife.  Puree the tomatoes.  I had to do this in batches...


Then, pour the entire mixture in a large pan.


Roast at 425 degrees for approximately an hour and half, stirring occasionally.  When it's done, you can part the mixture when you run a spatula through the middle.  Like so...


Refrigerated, this can last for up to a week.  Frozen in 4-oz. containers, it supposedly can last up to six months.  Yet again, I choose the Food Saver route.


We'll see how these tomato preservation methods pan out soon!  In the meantime, I have a whole 'nother load of tomatoes sitting on my counter!  I think salsa is in our future tonight...the one way David will eat raw tomatoes, lol!

Friday, July 6, 2012

Hello and Good-bye

This has been a hard week on me, which is why I haven't blogged since Monday.  I found out Tuesday morning that my former boss, mentor and wonderful friend passed away.  It wasn't a great surprise, but at the same time I don't think you can ever be ready for something like that.  Tom was my lunch buddy for years; man, that guy loved his food.  He'd probably be disappointed to see that my normal lunch around here is usually this...


A delicious salad with greens, poppy seed dressing, carrots, dried cherries, chopped tomato (fresh from our garden), boiled egg, sunflower seeds and a chopped avocado.  If I don't have leftovers from the previous night's dinner...this is what adorns my lunch plate 98% of the time. 

Tom would have liked something more along the lines of BBQ ribs, chicken-fried steak or pork tamales.  I ate well when I worked for that man, let me tell you.  And when I wasn't any longer, I always made a point to eat with him for lunch when I was in town visiting.  Life won't quite be the same without his email and telephone exchanges.  But, I know he's in a better place and I'd rather remember the fun times we shared rather than dwell on his last few painful months.

Now, what Tom would have approved of is this delicious ice cream dessert that Liz and I made while she was visiting.  Which, also happens to be the last item we made together that I was wanting to share on here.

 
Though Tom wasn't a huge sweets eater, I'd like to think that he would have really enjoyed this.  It's super easy and super delicious, though very rich.  I clipped this recipe out of my Food Network magazine from a Philadelphia Cream Cheese ad.  If you'd like the recipe, simply click here.  You won't regret it, promise!

I hope you have a blessed weekend and I'll be saying hello again soon!  Just like Tom will be some day!

Monday, July 2, 2012

Fun and Fresh Summer Food

Last week my sweet sister-in-law was here.  One thing that I love about when she visits is that we can make tasty food that David doesn't necessarily like.  Let's face it, when your husband doesn't like it, you don't cook it very often.  Why?  Because I don't want to eat an entire vat of something all by myself.

First up was a margherita pizza.  I love tomatoes and I love basil...David likes neither.  And we're growing both.  In fact, I'll share a little bit of our backyard and garden.

Here's my little back porch spice pots.  Complete with basil, rosemary and parsley.  I started out with dill as well, but the basil kinda took over and killed it off.  I had aspirations of pickles...guess I'll just have to buy some fresh dill from the farmer's market when that day comes.


Next up, we're growing some peppers!  The only one producing thus far is our red chili plant.  I've already picked about 20 peppers and they're still comin'!


The last foodie item I'll share is our tomato plants...  We have one big boy and one heirloom and they're both super healthy boys, let me tell ya!


In fact, here's what we've got so far.  I've currently only eaten/cooked 2 tomatoes off our plants...


As you can probably tell, the little guys in the top right-hand corner I picked a few days ago.  The grouping on the bottom was yesterday and the greener guys in the top left are what I picked today.  And you can even sneak a peek at the red chili peppers we've harvested on the right.  When I look at this picture I think to myself, "What was I thinking growing two tomato plants when I'm married to someone who hates tomatoes?"  Oh well, they'll be put to good use. In fact, earlier this spring I bought this book:


And I fully intend to utilize some of these recipes.  In fact, as I thumb through the tomato section, I see a delicious oven-dried tomatoes recipe that will probably be experimented with in the coming week.  That is, if these plants keep producing so many 'maters.

But anyway, I digress...you want to know what Liz (my SIL) and I made last week, right?  That margherita pizza I referred to earlier?  Well, I didn't take any pics when I made it for the two of us.  But luckily, I made it again last night because it was just so darn good. 

First off, you need to prepare a pizza crust.  My ol' standby recipe is the Pioneer Woman's.  I originally shared that recipe way back when and if you want to give it a go, just click here.* 

*I do prepare the dough a little differently now, since I have a husband who moonlights as a wheat farmer.  If you prepare the dough with half all-purpose and half whole wheat flour, you're making the crust a healthier option.  And honestly, I like the bite of the whole wheat flavor better.

After you've prepared the dough and let it rise for about an hour, it'll look like this. 


Grab you a pizza stone (or whatever sheet pan or regular pan you normally bake pizza on) and spread it out with your fingers.  If it hasn't been refrigerated, it's very pliable and can be spread without using a rolling pin.  I always like it when the dough makes it easy on ya like that.


Once you've done that, slice up a hearty tomato into thin slices and spread it evenly over the dough.  This one was perfect, red all the way though.  Mmmm...  Then, slice up some basil and sprinkle it with some mozzarella on top of the tomatoes.


Next, you want to bake it in a hot oven so the bread cooks quickly, but you don't burn or overcook everything else.  I baked mine in a 425 degree oven for about 20 minutes.


It smells uh-mazing at this point.  That basil really gets potent once it's baked.

Can you get any better than picking the tomatoes and basil out of your backyard?  Delicious and you can't get any more local and fresh than that!

Next up is a recipe I want to share before the favorite, hot, summer holiday rolls around: Independence Day AKA 4th of July.  Liz and I prepared the Pioneer Woman's Watermelon Granita last week and it couldn't have been an easier recipe!

Seriously, this recipe has three ingredients.  THREE!  That is seriously it.  It's a bit time-consuming in that you have to scrape the top of the granita every couple hours, but Liz and I took turns.  Time-wise, it probably took an entire afternoon...but, if you count every minute we were actually tending to the granita...maybe an hour?

And after you finish and taste this recipe?  OMG, so refreshing.  This would be the perfect dessert for a BBQ on a hot summer day.  Plus, you don't really need to feel guilty because 99% of the recipe is fresh watermelon! 

So, looking for a delicious, refreshing and low-calorie dessert?  This is a winner!

Here's what ours looks like....and don't think I haven't been snackin' on this thing for the past few days!


And with that, I'll leave you with a few more pics of some of the other plants/flowers on our back porch.


LinkWithin

Related Posts with Thumbnails